


If unfortunately the dress or shirt you own is tight at the waist and you don’t know how to fix the tight waist. Don’t worry too much, read this article now to proactively fix it in the most effective way!
Widen the waist of the shirt
Fixing a shirt with a tight waist by widening the waist can be done simply with the following steps:
Ingredients to prepare:
A piece of fabric that matches the color and material of the shirt.
Pen or fountain pen.
Step 1: Prepare the shirt: Flat the shirt on a desk or flat surface.
Step 2: Mark the position that needs to be expanded: Mark the position that needs to be expanded on the shirt using a pen or water pen. If possible, make a guide to help you sew in the right position.
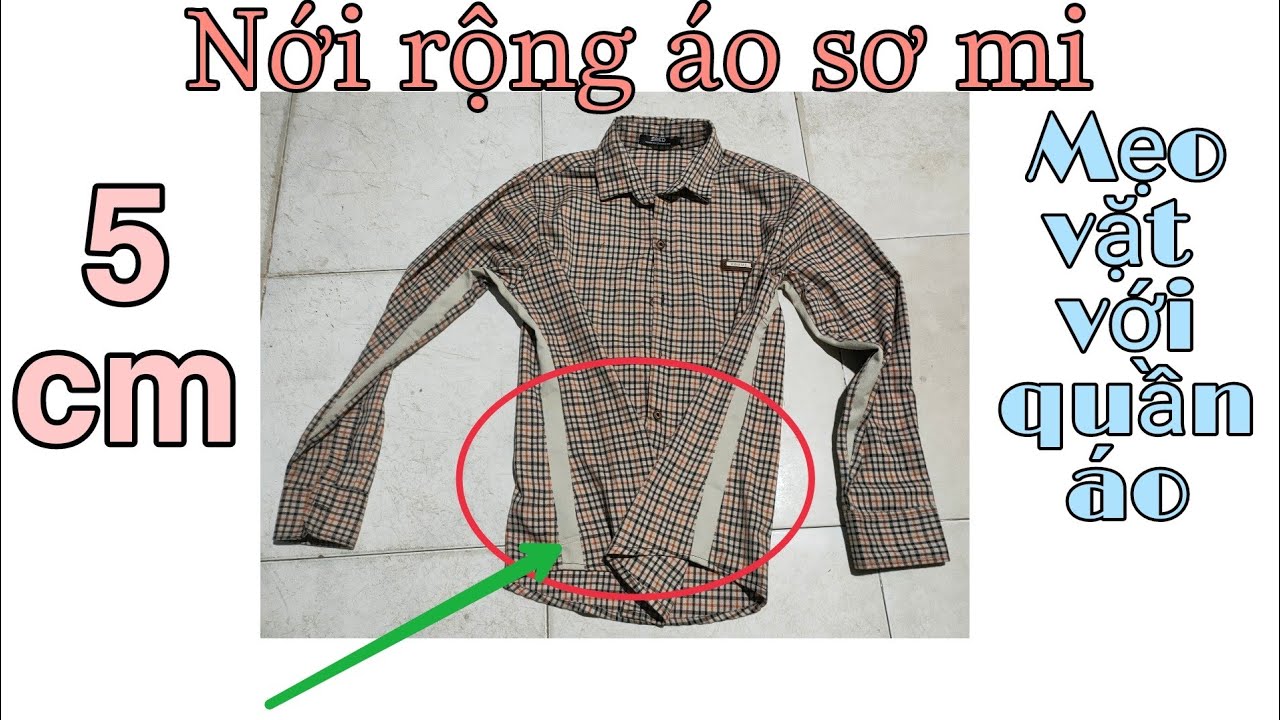
Step 3: Prepare the cloth: Prepare the cloth with a length suitable for the position you have marked and a width of about 5-8cm depending on the degree of expansion needed.
Step 4: Sew the fabric to the shirt:
4.1. Place the cloth on the spot you marked.
4.2. Begin sewing the fabric onto the shirt, using precise seams and keeping the seams straight and even.
Step 5: Check and adjust:
5.1. After sewing, try on the shirt to make sure the waist has been widened as desired.
5.2. If necessary, you can adjust the width of the fabric or make other corrections to achieve the desired appearance.
Converted into a crop top
If you want to convert a tight shirt into a crop top, here are detailed instructions:
Ingredients to prepare:
- Pen or fountain pen.
- Sewing needle set.
- Drag.
Step 1: Measure and mark the desired length:
1.1 Put on the shirt and measure the length from the top of the shoulder or from the bottom of the collar to where you want the shirt to end.
1.2. Use a pen or marker to mark where to cut

Step 2: Cut the shirt:
2.1 From the position you marked, cut the shirt horizontally to create a crop top.
2.2. If you want your shirt to have a symmetrical cut, make sure you cut it straight and even on both sides.
Step 3: Cut details (optional): If you want to add details such as tangles, slits or vents, place the desired cut pieces and cut them.
Step 4: Sew the cut edges (optional): For sewing the cut edges, you can make them cleaner and stronger by using a sewing needle set.
Step 5: Check and adjust: Wear the shirt to check the length and check if the shirt fits well and comfortably.
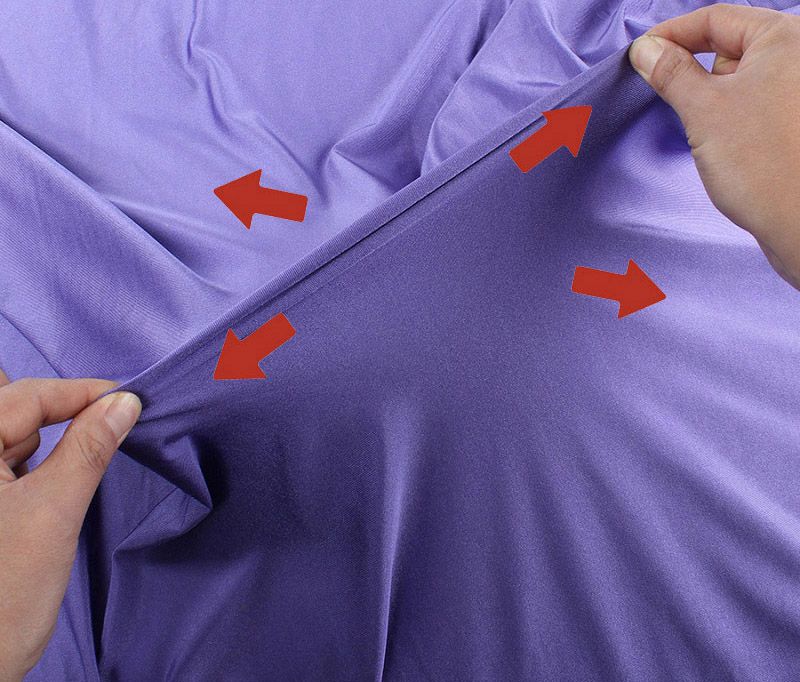
How to fix a tight shirt at the waist by stretching the shirt
Fixing a tight shirt at the waist by stretching it can be a simple and effective method. Here are detailed instructions:
Ingredients to prepare:
- The shirt is tight at the waist.
- Table or flat surface to work.
- Pulling tool (can use elastic band, hammer, or fabric softener).
Step 1: Prepare the shirt and desk: Place the shirt on the table or flat surface. Make sure the shirt is flattened without wrinkles.
Step 2: Determine the position that needs to be stretched: Determine the position or part that needs to be stretched to widen the waist of the shirt.
Step 3: Stretch and hold for time:
3.1. Once the puller is in place, gently pull the shirt horizontally to create pressure and widen the waist area.
3.2. Hold the shirt for a while to give the fabric time to “remember” its new shape.
This article has helped you know how to fix a tight shirt at the waist simply at home. Let’s consult and choose the appropriate way to overcome this situation in the most effective way! If you are in need of sewing/buying school uniforms at all levels; or medical uniform; or work protection uniforms, etc. Refer now to FMF fashion uniforms – we always have samples available. Accept logo printing/embroidery upon request. It will definitely meet your needs – friends!

 Tiếng Việt

Sản phẩm
Red And Black Short-Sleeve Workwear Set
Red And Black Long-Sleeve Workwear Set
Blue And Grey Short-sleeve workwear set
BLUE+GREY LONG-SLEEVED WORKSUIT
CHARCOAL+GREY SHORT-SLEEVED WORKWEAR
CHARCOAL+GREY LONG-SLEEVED WORKWEAR
SHORT-SLEEVED REFLECTIVE GRAY WORKSUIT
LONG-SLEEVED REFLECTIVE GRAY WORKSUIT
GREY COORDINATE LONG-SLEEVED NAVY
NAVY POLO JERSEY
POLO BLUE+NAVY JERSEYS FOR MEN AND WOMEN
POLO JERSEY NAVY+WHITE MEN’S/WOMEN’S